How to Create a Deliverable
Now that you have a Template and entries in your Knowledgebase, let's put it all together and create your first document or what we call a Deliverable.
Step 1: Getting to and Selecting your Deliverable
Let's get you to your Templates and select the template for your first Deliverable.
-
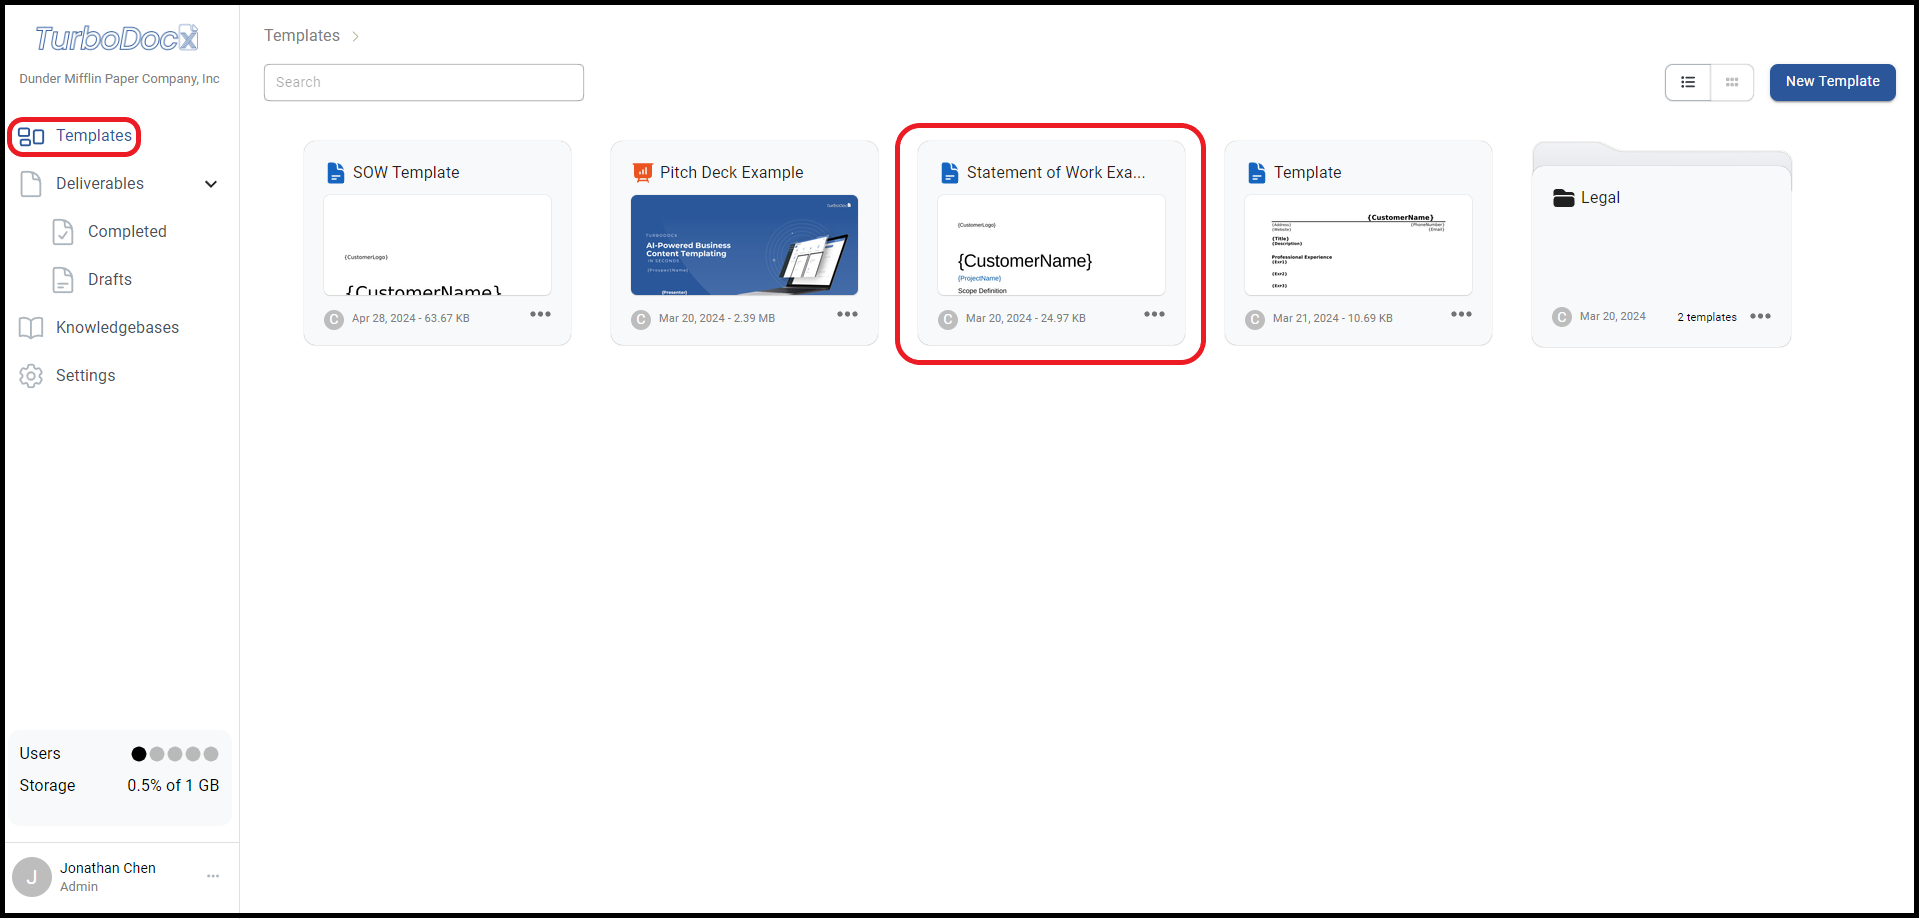
On the left hand side click on the Templates tab.
-
Next select the template you want to use. If you have folders set up or pages of templates that makes it hard to find the template you want don't forget the search feature!
-
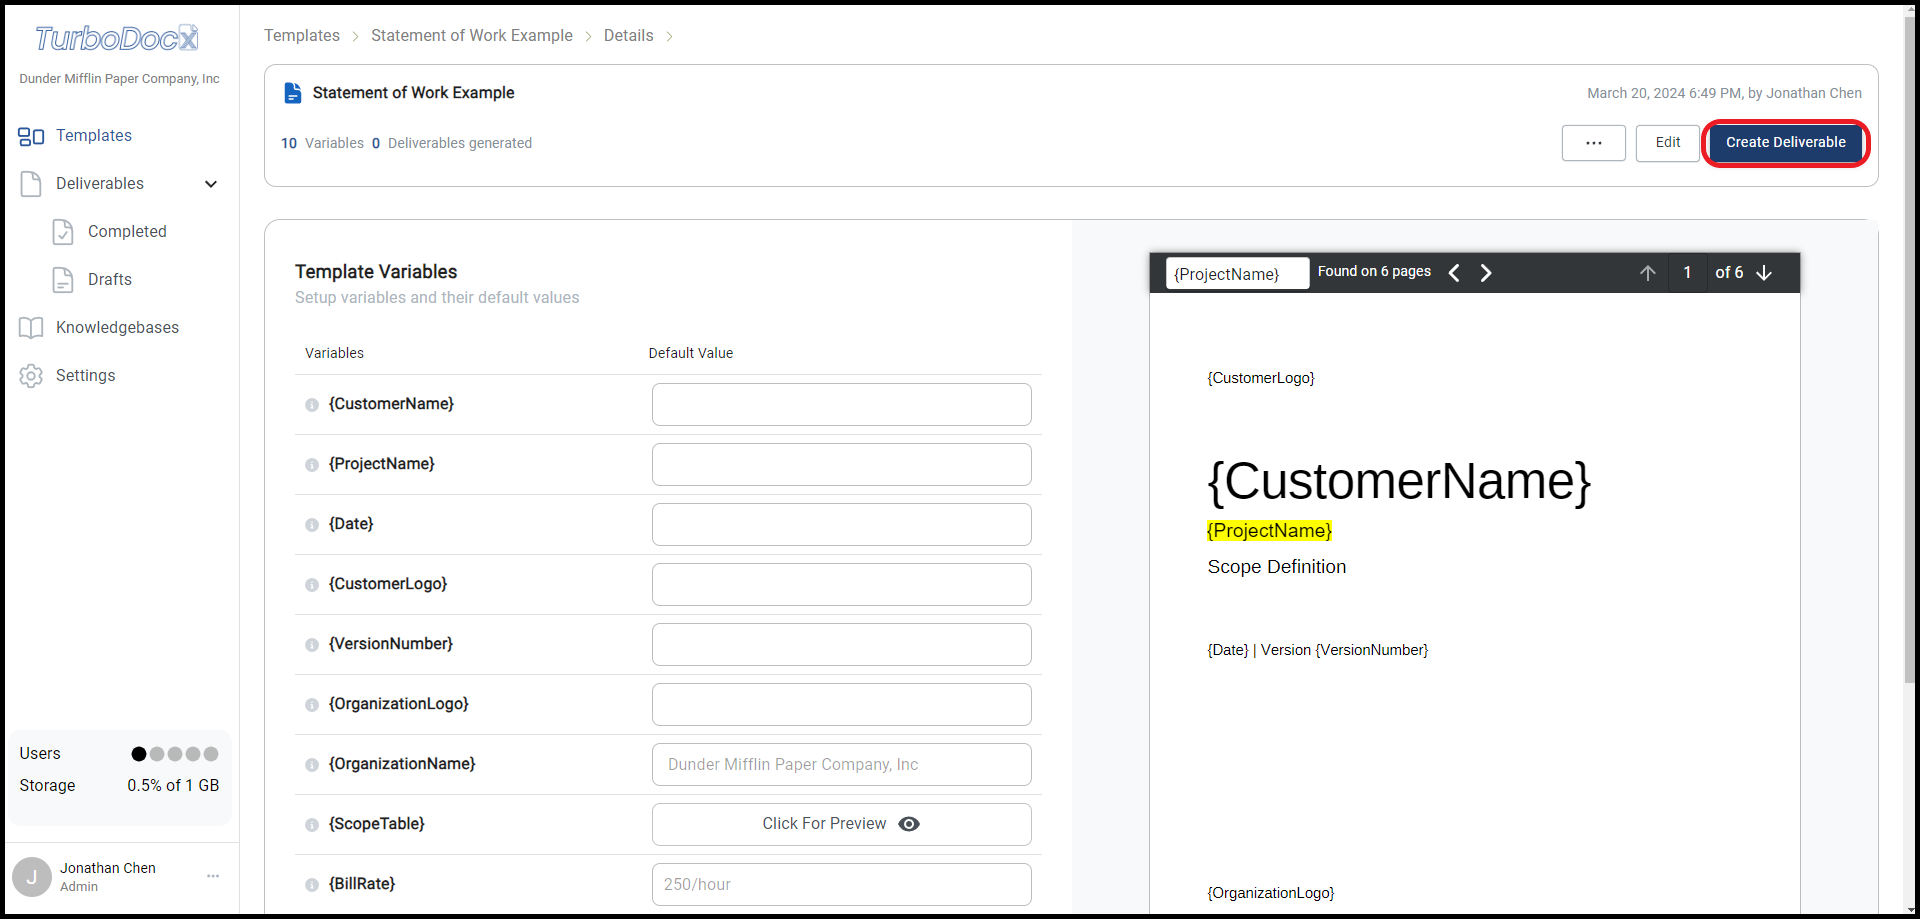
With your template open it should look like the image below. Here you can check to make sure all your variables are present and also have a preview of the template to make sure you have the right document. If everything looks correct, you can go ahead and click "Create Deliverable
Step 2: Creating your Deliverable
After you've clicked "Create Deliverable" you will be brought to a new page where you will be able to enter and edit all your variables.
There are multiple ways to enter and edit your variables so for Step 2 we will break it down into 3 parts: Simple Text Entries, Advanced Entries, Variable Stack and Disable Variable.
For future reference this information can also be found under the "Additional Information" tab under "Variable Entry".
Simple Text Entries
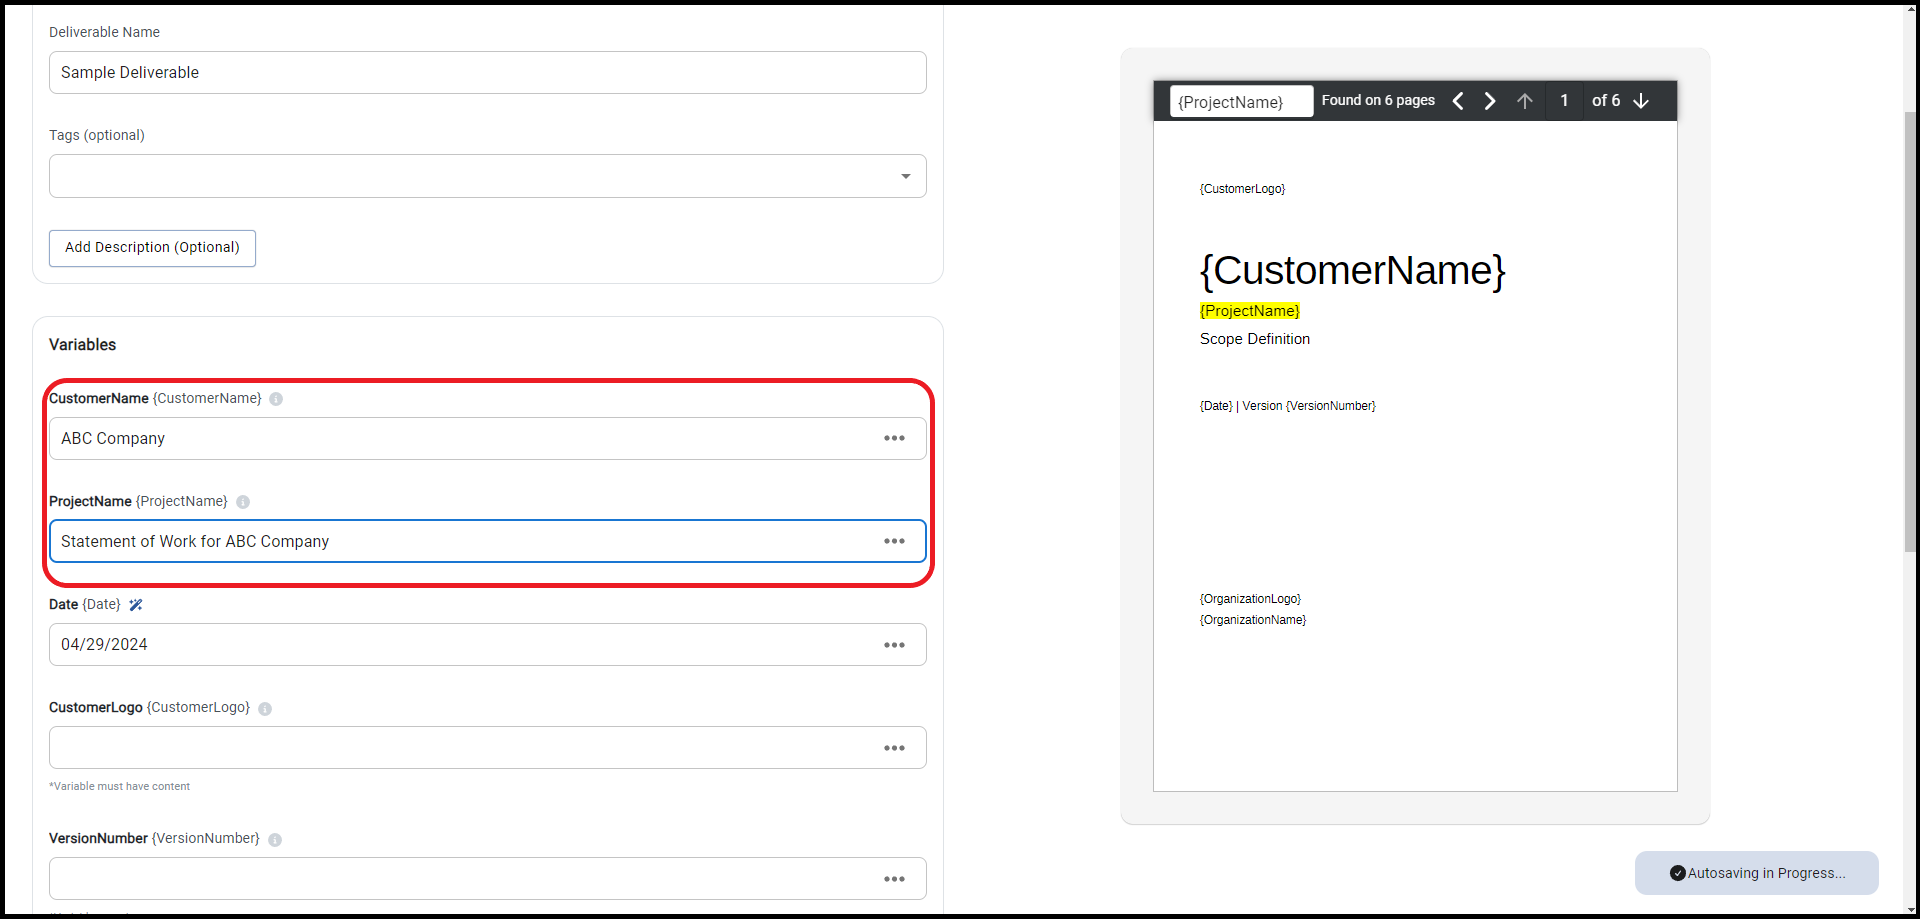
In this first example we will be using simple text entries. Things such as "CustomerName" or "ProjectName" already have formating in the template so just clicking on the box and typing your entry will be sufficient for us here.
Advanced Entries
What happens if we need a more robust entry? Maybe we want something from our Knowledgebase entries, an image or just add some formatting to the text. We'll go through each option in this section.
- First, what we will do is click the more options or the triple dot button located next to the variable boxes. Here you will see all the options we just discussed and more.
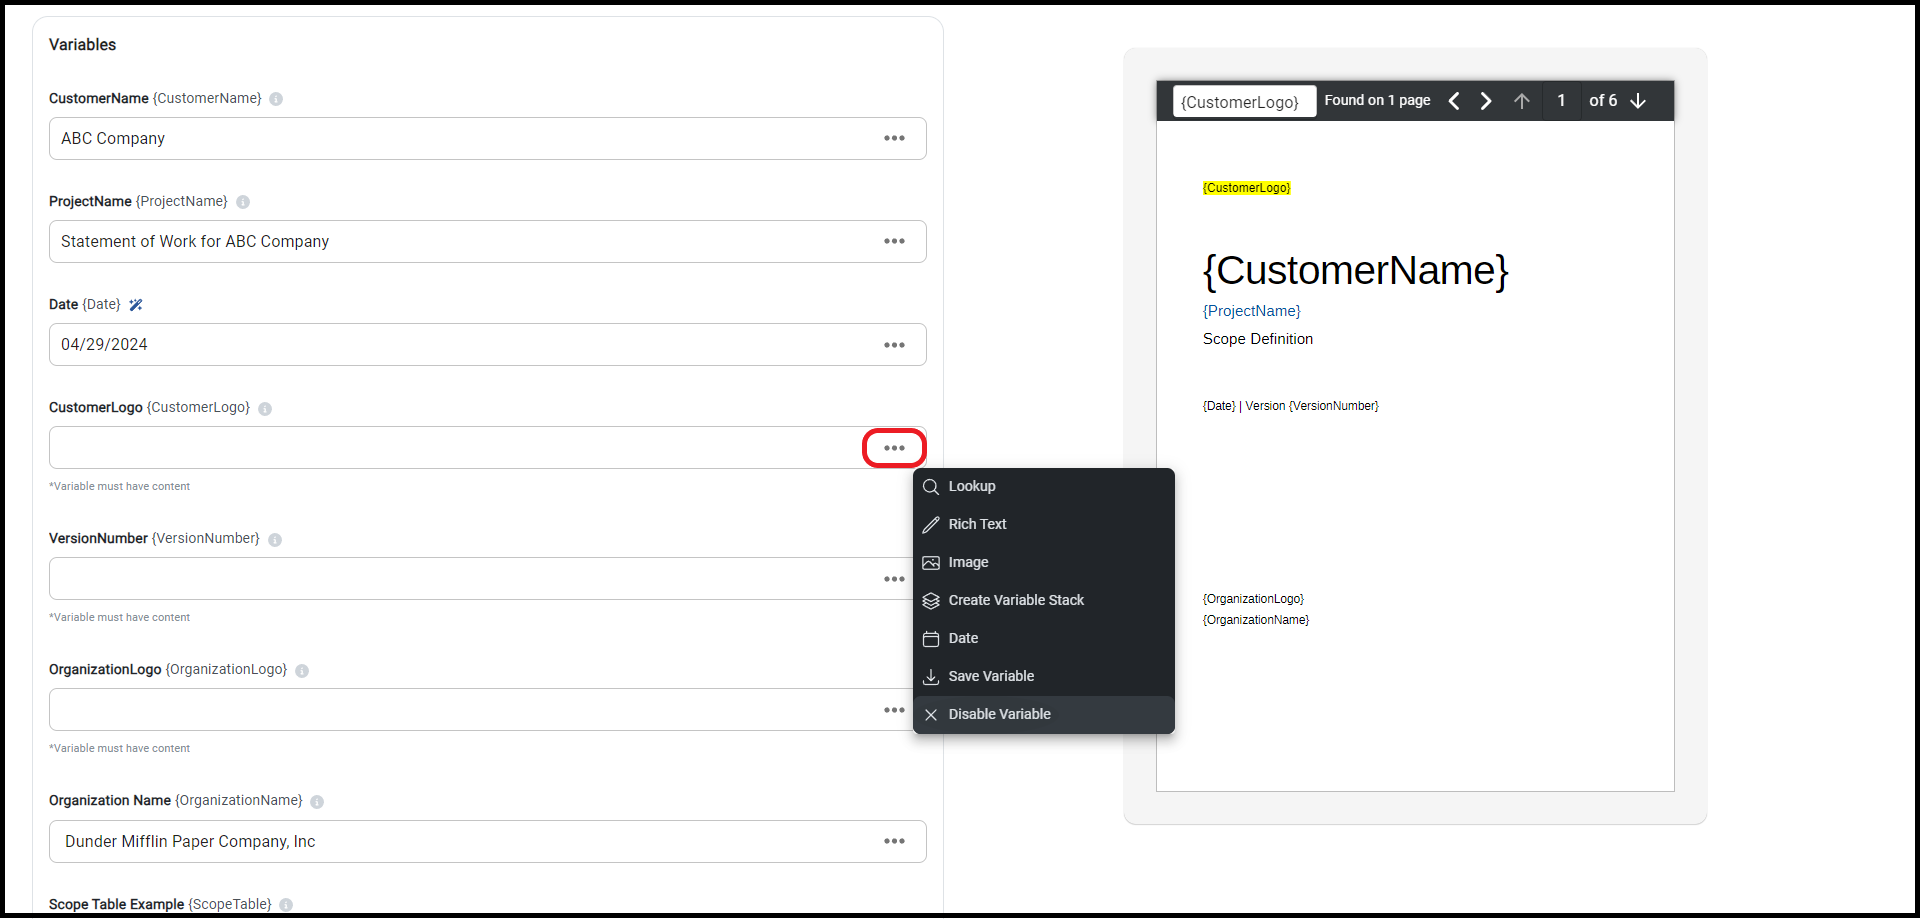
- Next, please select the option you would like to utilize.
Lookup
To select something from your Knowledgebase, click Lookup.
A popup window will display all your entries. Scroll or search through them. The search feature will look for the keyword in the name, tags, or content. Larger entries have a preview option. Once found, click the blue "Select" button.
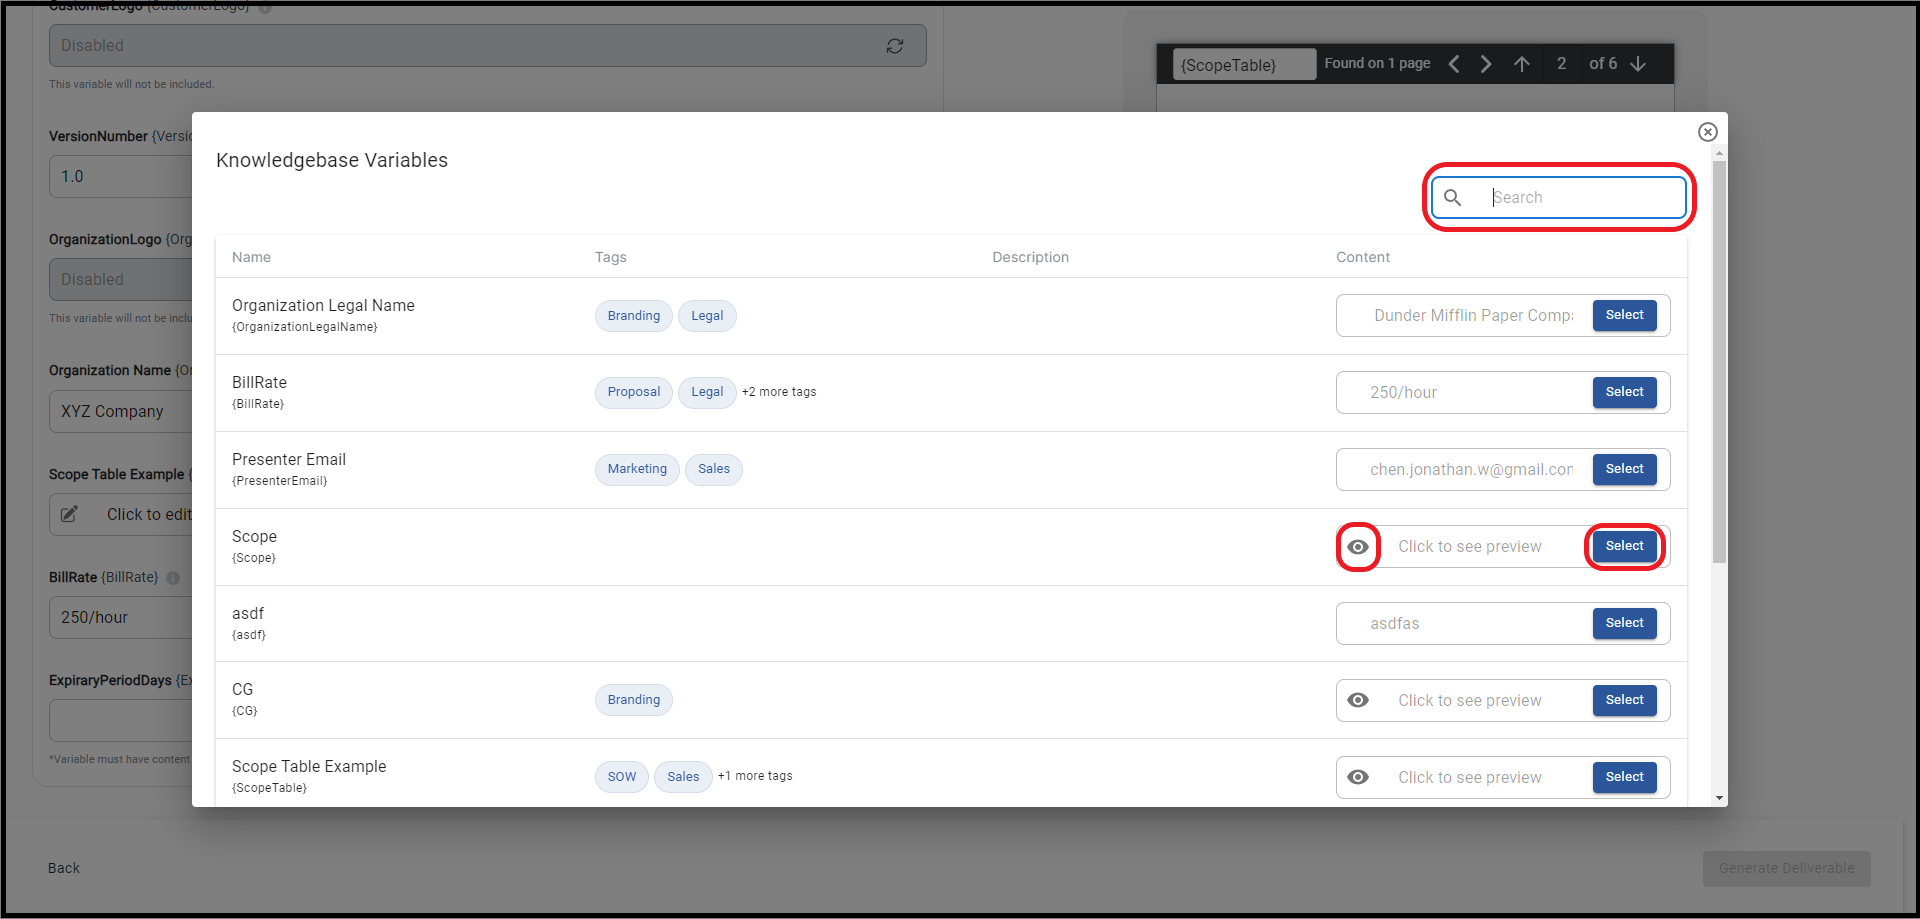
- This is where tags and descriptions when creating the Knowledgebase entry may come in handy.
- Even after selection, you can edit variables for any necessary changes from the Knowledgebase entry. Simply click the content box for simple text changes. For other variable types, use the pencil and paper icon to edit.
Image
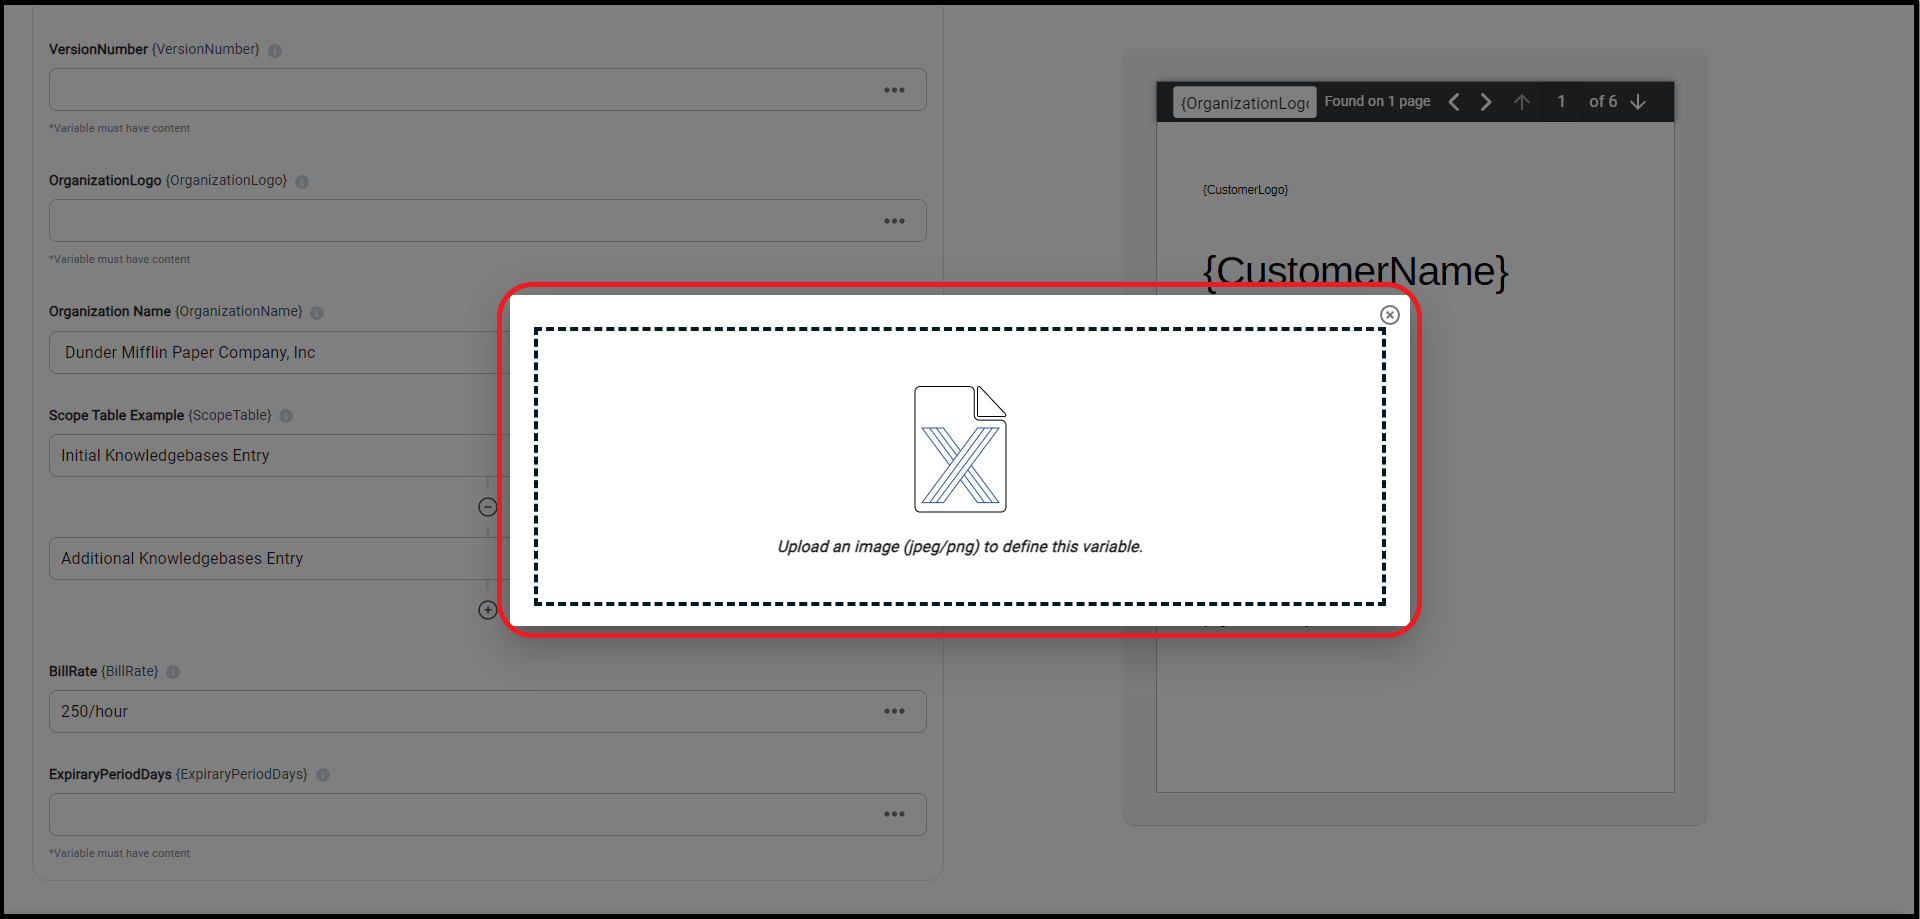
For images, click Image.
A pop up will come up where you can click on it to open your file browser and choose an image.
Rich Text
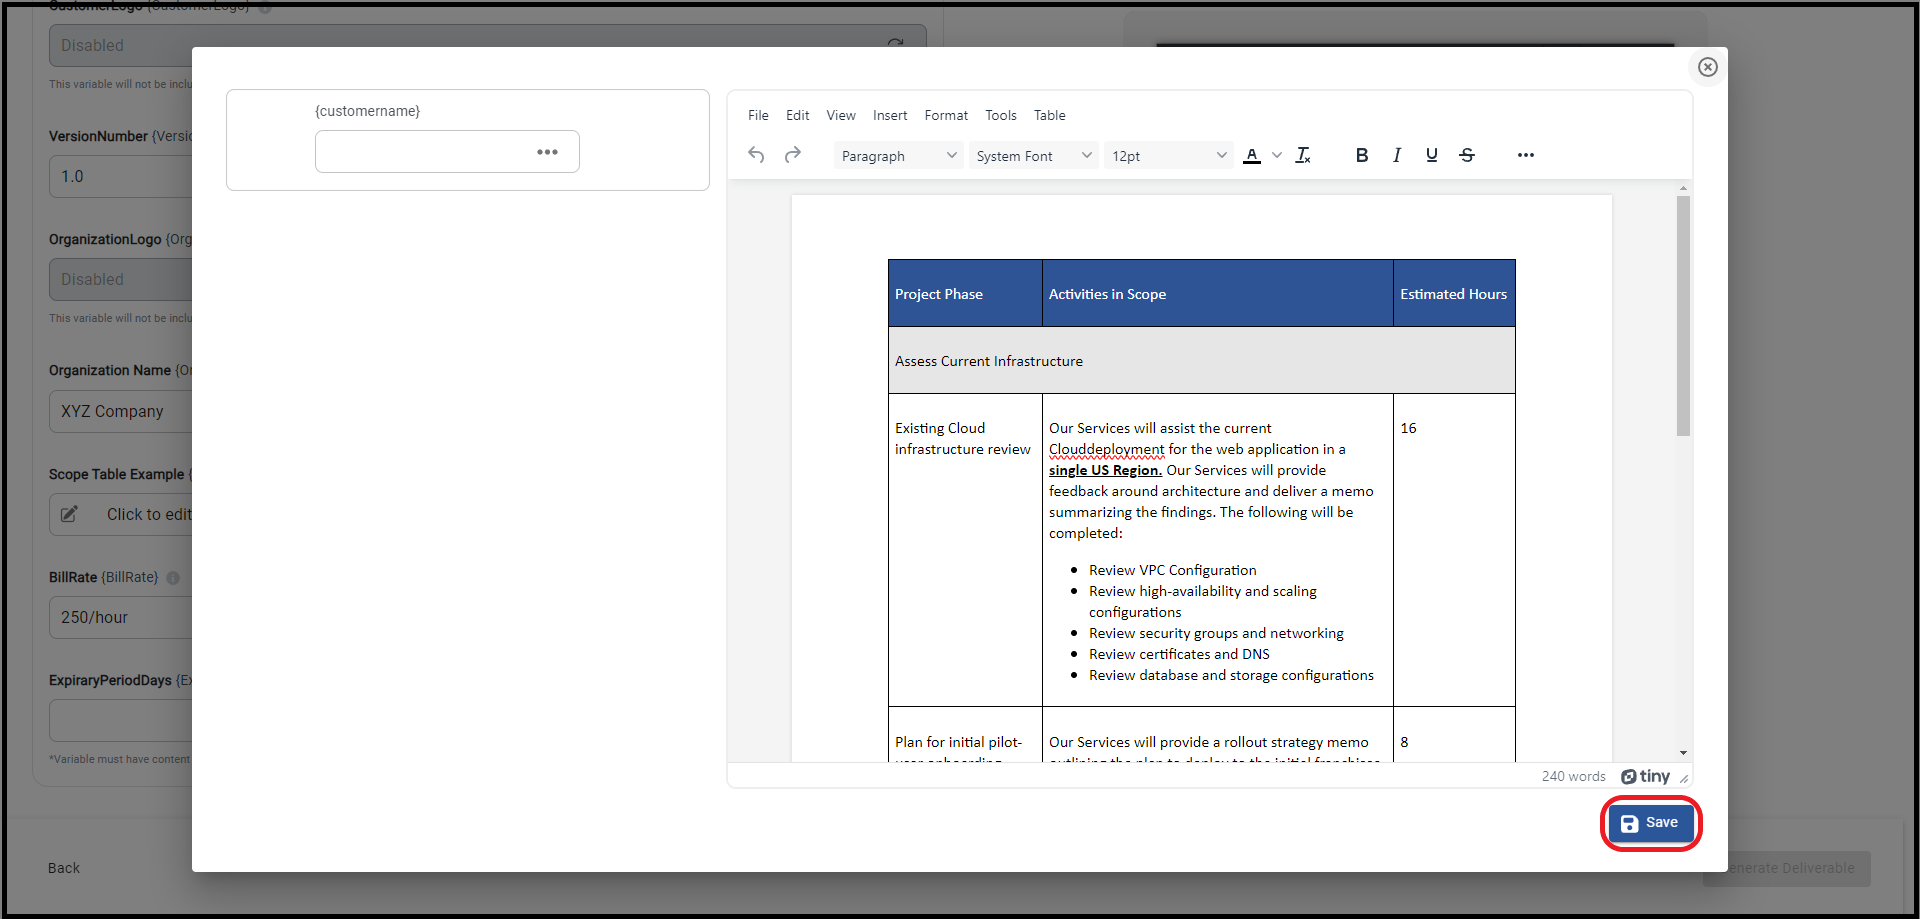
For text that you need to format, or if you'd like to add a table you will click on Rich Text.
A new window will pop-up as shown in the image below. Here you will see familiar options such as text formats, colors as well as the ability to add tables among other things. Just click the "Save" button when you're done
Date
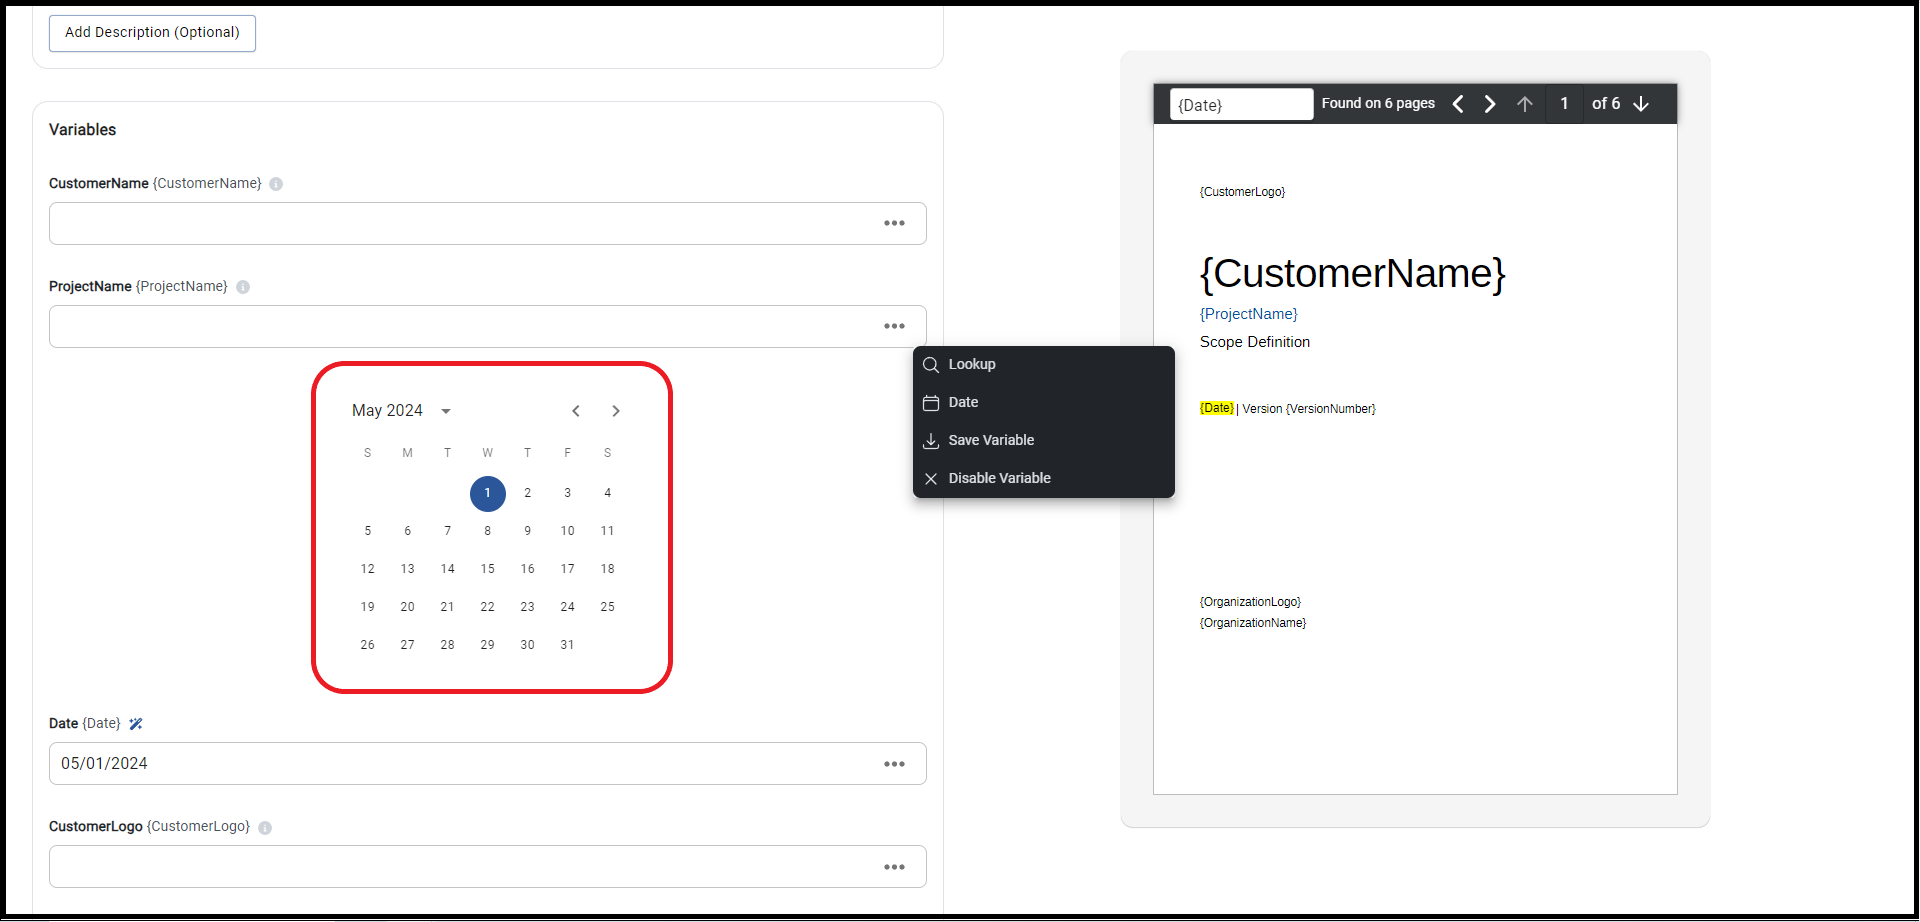
For a date, click on Date.
A calendar will pop-up above the variable which you can then use to select the date.
Variable Stack and Disable Variable
Sometimes you will need more than one entry for a given variable and others you will not need a certain variable at all. These two options will allow you to do that.
Variable Stack
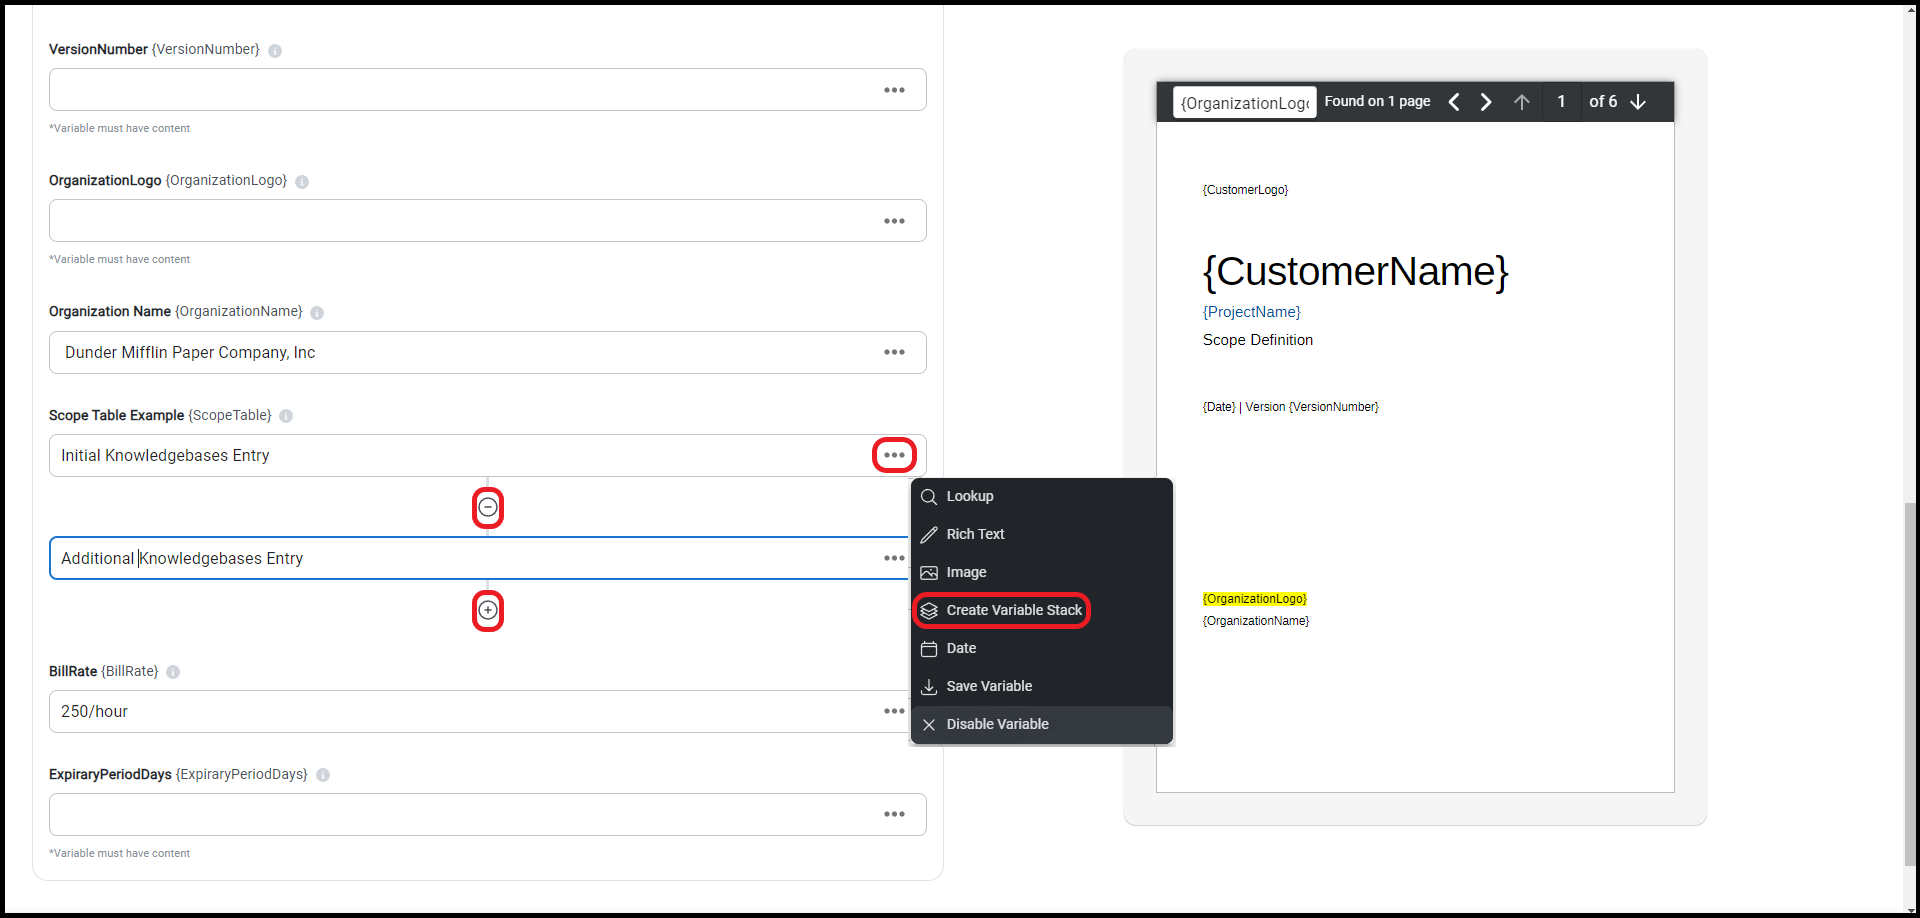
If you need multiple variable entries or images for a section of your Deliverable, click Create Variable Stack under more options.
You'll return to the original page with a "+" button under the variable. Add stacks by clicking "+", to remove them click "-".
Disable Variable
Sometimes a variable is helpful to have in a template but may not be needed in every Deliverable. For instances where the variable is not needed you can click on more options and then Disable Variable.
This will remove the requirement to have content in that variable. To undo this just click the button that now replaced the more options button.
Step 3: Generate Deliverable
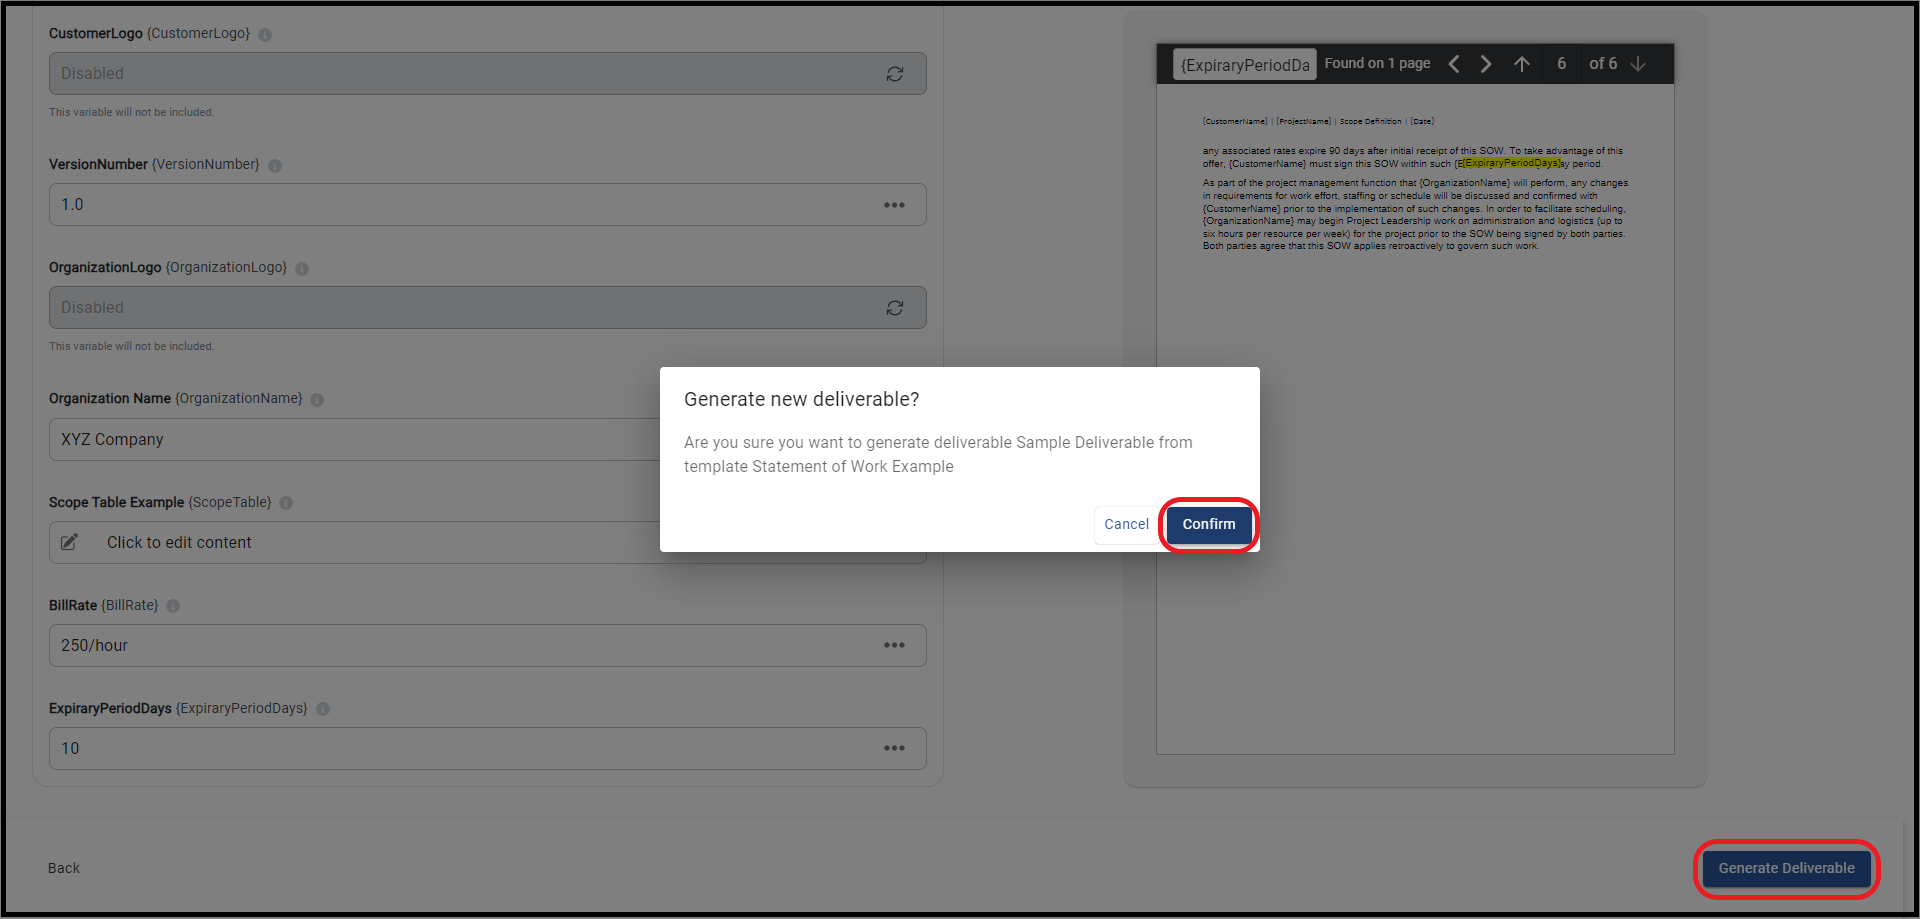
Once you've completed filling out the variables in your Deliverable, click the "Generate Deliverable" button on the bottom right of the page and then "Confirm" on the pop up.
Step 4: Export Deliverable
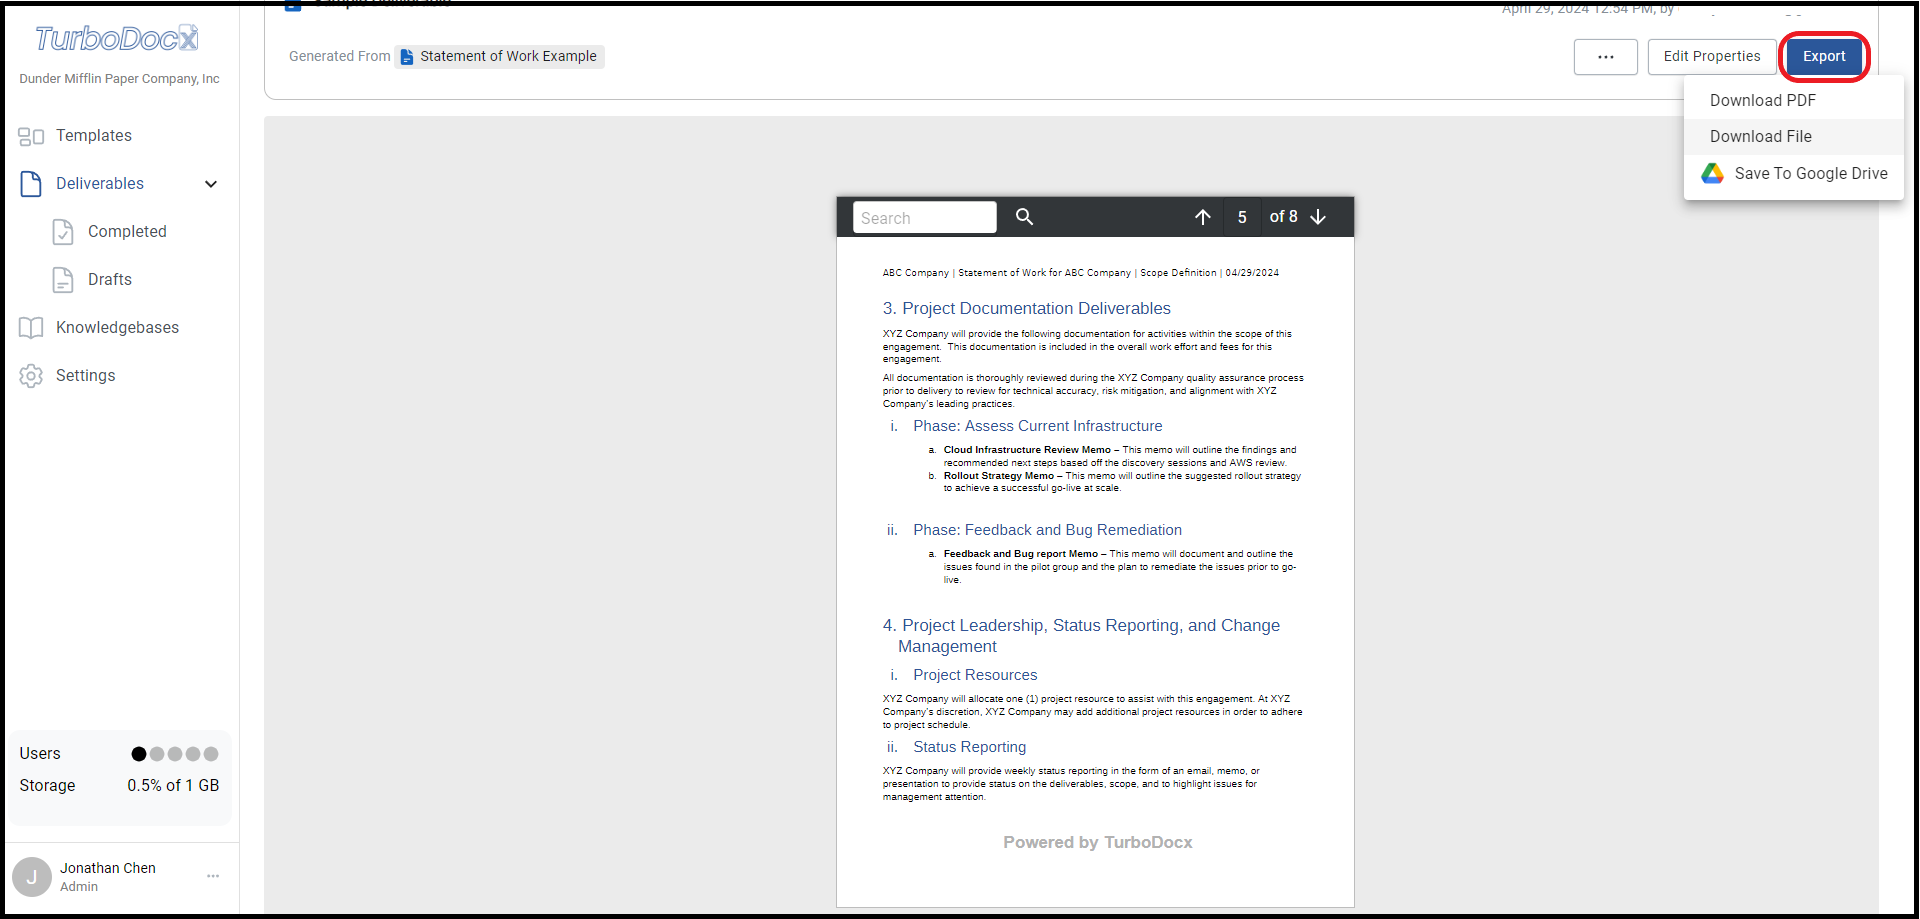
Once you've clicked "Confirm" the next screen will be a preview of your deliverable. After you've taken a look you can press the "Export" button on the top right. Select how you would like to export it and you're done!
Finished
Congratulations on creating your first Deliverable. I hope these tutorials were helpful and we look forward to working with you to create quick and easy documentation automation!